

Choose what the page shows
How to set the target, models, date range, and filters of the Attribution page, and how to reorder and collapse the page sections.
The filter bar at the top of Attribution controls every section of the page. A change in the filter bar updates the summary cards, the chart, the table, and the flows together.
How do you select the outcome and the models?
Section titled “How do you select the outcome and the models?”Use the Target and Model controls on the left of the filter bar.

-
Select Target and select an outcome.
The list shows the targets that your account models. If your account has one target, the filter bar shows the target name with no menu.
-
Select Model and select the models to include.
Select All includes every model. Deselect All removes every model. The control then reads All, None, the name of one model, or a count.
-
If a model has 2 or more configurations, open the submenu next to the model name to select a configuration.
Each configuration shows the last day that has modeled data. A configuration other than the default shows its name under the model name.
The Model control appears only when the target has 2 or more models, or when a model has 2 or more configurations.
How do you set the date range?
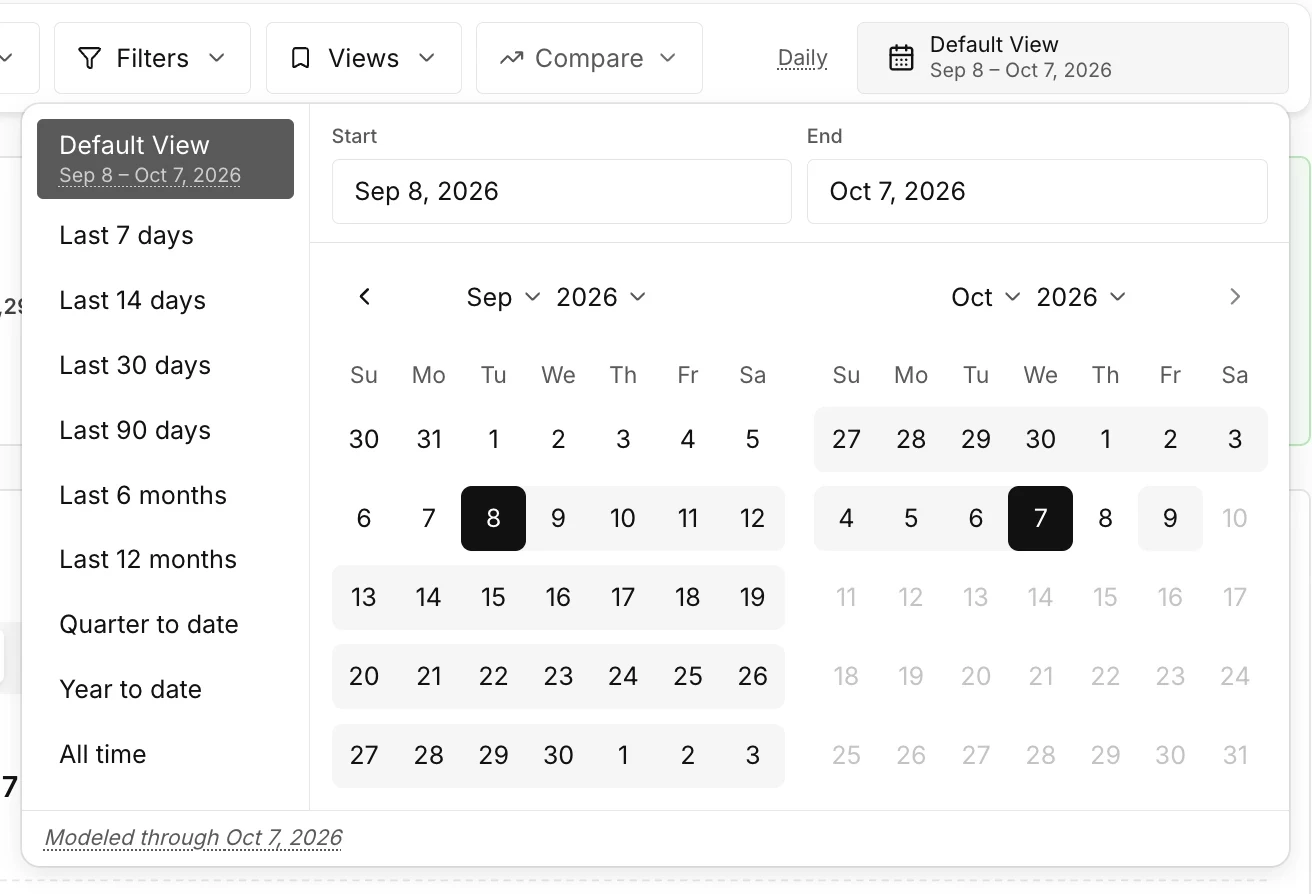
Section titled “How do you set the date range?”Use the date control on the right of the filter bar. The control shows the selected dates.
-
Select the date control.
-
Select a preset, or select a start day and an end day on the calendar.
You can also type exact dates in the Start and End fields.
-
To return to the default period, select Default View.
With daily granularity, Default View is 30 days. With weekly granularity, Default View is 4 whole weeks. The period ends on the last day that has modeled data.
A date range that you set can return to Default View after you change the target, a model, or a configuration. This occurs when the granularity changes between daily and weekly, or when your range ends after the last modeled day of the new selection.
The label next to the date control reads Daily or Weekly. The label reads Weekly when one or more of the selected models are weekly. A weekly date range contains whole weeks only, and the presets change to week presets.
How do you filter by channel, tactic, or campaign?
Section titled “How do you filter by channel, tactic, or campaign?”Use Filters to narrow the whole page.
-
Select Filters.
-
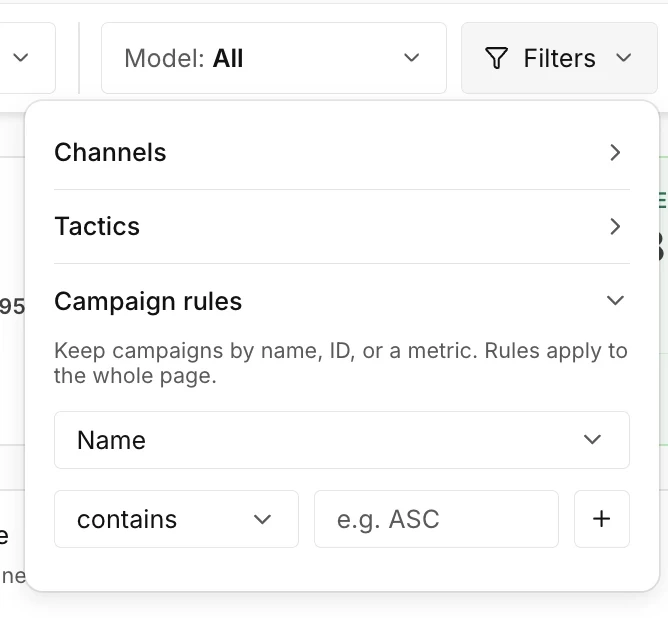
In Channels, clear the channels that you do not want.
All channels are selected by default.
-
To filter by tactic, open Tactics, select Include or Exclude, and select the tactics.
-
To filter by campaign, open Campaign rules and add a rule.
Select a field, a condition, and a value, then add the rule. A rule can match the campaign name, the campaign ID, or the value of a metric.
-
Close the menu.
The Filters button shows the number of active filters. Each active tactic filter and rule shows as a chip under the filter bar.
To remove one filter, select the remove button on its chip.
How do you arrange the page?
Section titled “How do you arrange the page?”You can change the order of the sections and collapse a section.
- To move a section, hold the pointer over the section and select Move up or Move down on the left of the section. The order is saved to your profile.
- To collapse a section, select the arrow next to the section title. Select the arrow again to open the section. The collapsed state is saved in your browser for each workspace.
The summary cards have no title and cannot be collapsed.